Simply Amazing Roast Chicken Dinner

The people in my family are big on comfort food.  All three of us have favorites that we never get tired of. The toddler loves pho, eggs and all kinds of fruit/berries and eggs.  Me, I could eat lasagna or mashed potatoes any day of the week.  For my hubs, at the top of his list is roast chicken.  I started making it about 5 years ago when we first moved to Seattle.  I was on this weird kick where I was trying to cook foods that I hadn’t grown up with, forcing myself to cook outside the comfort zone that my mom taught me.  My mom was a boneless, skinless chicken breast person, and for a long time that’s all I made.

Finally got some snow in Seattle!

Finally got some snow in Seattle!

Then I read a whole lot of books.  I read the Omnivore’s Dilemma by Michael Pollan, Fast Food Nation by Eric Schlosser and Animal, Vegetable, Miracle by Barbara Kingsolver.  These books changed my life and my whole perspective on food.  Looking back I realize how ridiculous I got, but I made the hubs and I do a locavore diet in JANUARY.  Do you know how much fresh, local stuff you can get in January???

It was hard, and we did it for about 6 months, but it was totally worth it.  I went on an organic crusade that I still can’t seem to let go of, and most importantly I began to care about where my meat came from.  I was that person in Portlandia asking if the chicken I was buying had a “happy life.”

My focus turned to quality and thinking about what was important to me about the food my family ate.  Ultimately my experiments led us to a few key principles that still govern our eating today:

1. We buy what’s in season.  This is HUGE at our house.  We do not eat fresh strawberries or blueberries in February.  We also only eat fresh tomatoes during the summertime.  I find that we now get really excited about the changing seasons and we truly enjoy things when they are in season.  We also do a lot of freezing, drying and canning to preserve things when they are abundant and taste their best.  I think Rainier cherries are the perfect example of this.  Many people in the country will never get to try our amazing cherries fresh, they’re too delicate, so if they do get flown across the country they get crazy expensive.  During early summer everyone I know in the Pacific Northwest eats Rainier cherries with gusto.  They taste incredible!

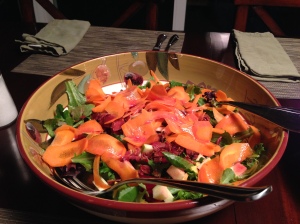
Winter salad of greens, carrot, pickled beets, cheese and vinegarette

Winter salad of greens, carrot, pickled beets, cheese and vinaigrette

2. We don’t buy produce from Mexico or South America. For the most part we choose products that are from Washington, Oregon, Idaho, Montana and British Columbia.  Our next layer is California, then the rest of the US.  I will sometimes get kiwis from New Zealand or Pineapples from Costa Rica, but it’s rare.  The stuff from here just tastes better and I’d prefer to support my people.

3. During the summer, we try to hit up the Farmer’s Market every week.  We also like to go to the U-Pick places for berries and such.  Again, I just like to keep it local and in season.

4. We don’t buy more than we can eat.  My hubs HATES throwing out food, something I was terrible about until we started living together.  I have seen the man eat literally stale, rotten, moldy, gross food [Hubs’ note: I cut off the rotten and moldy parts.] just so that it won’t get thrown out and be wasted.  So, I have learned to become creative and cook what we have on hand. I’ve also learned to menu plan.  But, I think the biggest change is I don’t cook to feed an army anymore; I have a better sense of appropriate portions and use all leftovers to make lunches.  I personally hate eating day-old salad–I absolutely refuse to eat it–which means I’ve learned how to make the right size salad for the meal (TOUGH lesson to learn).

5. We buy only meat and dairy products that are hormone- and antibiotic-free.  Period.

All this brings me back to my chicken, the hubs’ favorite roast chicken.  This recipe has evolved over the past 5 years into what I think is an amazing dinner.  All it needs is a side salad or some roast broccoli and you have a meal your family will devour.

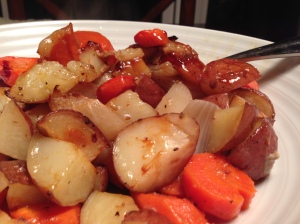
Roasted veggies

Roasted veggies

Roast Chicken with Vegetables

1 4- to 5-pound whole chicken (preferably one that was humanely raised)

1 Tablespoon kosher salt

0.5 Tablespoon freshly ground pepper

0.5 teaspoon baking powder

2-3 pounds of vegetables cut into large chunks (carrots, potatoes, butternut squash, onion and beet are preferred)

2 Tablespoons olive oil

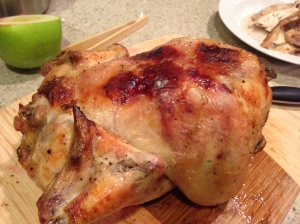
Resting the roast chicken

Resting the roast chicken

Directions

1. Heat oven to 400 degrees.

2. Cut up your veggies into large chunks, try to make them fairly equal so that they will cook at the same rate.  Put them onto a cookie sheet, pour olive oil on top, give them a mix and then spread them out into a single layer.

3. Mix salt, pepper and baking powder into a small bowl.  The baking powder can be omitted, but it helps the chicken skin dry out and get nice and crispy.

4. Set the chicken breast-side down on top of the vegetables and sprinkle/rub the salt mixture onto the skin.  Turn the chicken breast-side up and get that side as well.  You don’t have to use all the salt mixture, but it’s OK if you do.

A roast chicken with extra breasts in the oven

5. Put the chicken in the oven breast-side up for 30 minutes, then turn it over breast-side down and cook for an additional 30 minutes.

6. Check the temperature of the thigh meat and the breast.  You want it to be 165 degrees. If it’s not there yet, stick it back in the oven for 10 mins.  Repeat this until the chicken is done.

7. Once the chicken hits 165 degrees, take it out of the oven and place it on a cutting board and allow it to rest for 10 minutes.

8. While the chicken is resting, use a slotted spoon or spatula to lift the veggies off the cookie sheet and into a bowl.  Leave the juice on the cookie sheet.  You likely will not need any salt or pepper on the veggies; they will be well flavored from all the chicken goodness.

9. Carve your chicken and serve while warm.

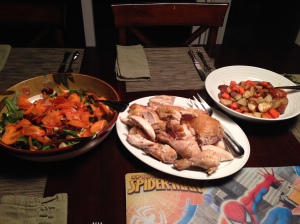
Roast chicken dinner with veggies and salad served family style

Roast chicken dinner with veggies and salad served family style

Peach and Blueberry or Apple Crumble

For the most part the Seattle winter has been pretty mild, but right now we’re in the middle of a frigid cold snap.  I think the high today is supposed to be 32 degrees, should make for a fun Superbowl Parade today.  Go Seahawks!

What I really want to be doing is working in my garden, tilling, weeding and puttering… but frozen soil makes that hard to do.  So instead I want to make a dessert that reminds me of the joys of summertime.

I spent most of the summer perfecting my crumble recipe, and I don’t think it’s 100% yet, but it’s super close so here it is.

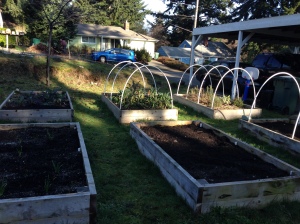
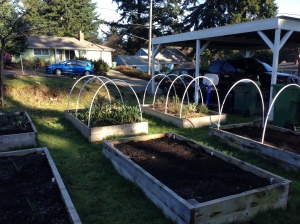
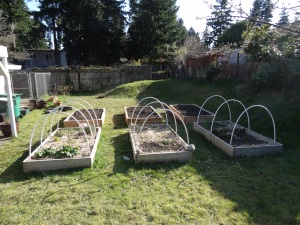
Raised beds in January

Raised beds in January

Fruit Crumble

Note: This is a perfect recipe for people who want some yummy baked summer fruit, but aren’t pie people.  I’m not big on pie crust, I prefer a think oatmeal-crusty topping.   This recipe can be adapted to any fruit, just increase or decrease the sugar based on the sweetness of the fruit and increase the amount of flour if you’re using watery fruit.

Ingredients for peach and blueberry filling:

3 pounds of frozen peaches and blueberries (peaches should be peeled and cut into slices or bite-sized chunks)

0.25 cup packed brown sugar

3 Tablespoons of whole wheat flour

0.5 teaspoon cinnamon

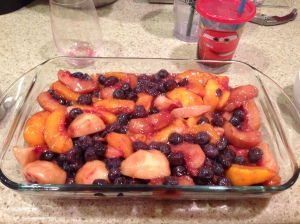
Peach and blueberry crumble filling

Peach and blueberry crumble filling

Ingredients for apple filling:

8 cups peeled apple slices (~26 ounces)

0.5 Tablespoon lemon juice

0.5 cup packed brown sugar

2 Tablespoons whole wheat flour

0.5 teaspoon cinnamon

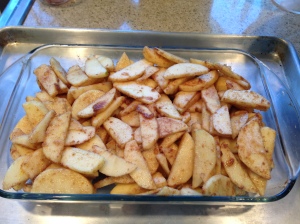
Apple crumble filling

Apple crumble filling

Directions for filling:

1. Put all ingredients in a large bowl and mix gently with a spatula.  Try to get everything evenly coated. If there is still a lot of liquid in the pan add another tablespoon of flour to help soak it up.

2. Pour filling into an 8″x11″ baking pan

Ingredients for crumble topping:

0.25 cup whole wheat flour

0.75 cup packed brown sugar

1 cup quick rolled oats

1 teaspoon baking soda

0.5 teaspoon cinnamon

0.125 teaspoon ground cloves (optional: it adds a definite tingly taste that some people love)

1 stick (8 Tablespoons) salted butter cut into pieces

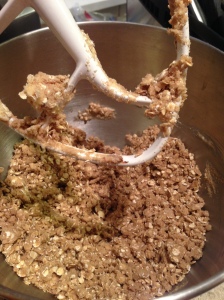
Crumble topping

Crumble topping

Directions for crumble topping:

1. Preheat oven to 350 degrees

2. Put all ingredients into bowl of stand mixer and use paddle attachment on low to medium and mix thoroughly.  You want the butter to be pea sized or smaller.

3. Put topping over filling and bake for about an hour.  If you’re using a smaller dish and it’s really full make sure to put it on a baking sheet to catch and boil over.  The top should be crusty brown and the filling should be bubbling up.

Enjoy with ice cream or home-made whipped cream.
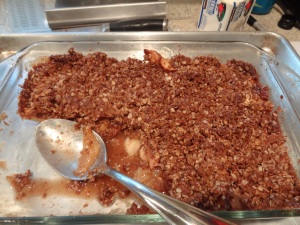
Apple crumble for dessert

Apple crumble for dessert

When life gives your kid the flu, make pumpkin lasagna

I have been stuck in my house for 48 hours.  The only time I was allowed to leave was when I made an emergency run to Babies”R”Us (my most hated store) for a new humidifier.  Yes, my toddler has the flu, and yes, he did get a vaccine.  I’m assuming that this bout would have been much, much worse if he had not received it.  I’ve been battling his low-grade fever, very productive cough, and constant stream of snot and drool for two whole days.
I need a break.

I need to not do laundry.

I need to go to work.

I need to cook.

Weirdly enough, when my kid is sick his appetite does not lessen in any way.  Today he ate with gusto, pounding his greek yogurt, soup and goldfish.  So tonight I decided to improvise a new dish and see if he would eat it.  He did, and it was actually pretty good.

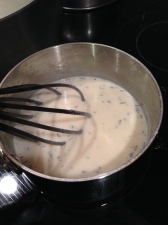
bechamel sauce

Béchamel sauce

Three-Cheese Pumpkin Lasagna

Note: Make sure to drain the excess water from the pumpkin puree.  You can do this by lining some paper towels onto a baking sheet, or by lining a colander with paper towels and putting the puree on top.  My puree was frozen, so as it thawed I was able to pour off the excess liquid.  Also I imagine you could use Parmesan in place of the Gruyère or the goat cheese.  I just used what I had on hand in my refrigerator.  

30 ounces of pumpkin puree (drained of excess water)

15 ounces ricotta cheese

5-6 ounces goat cheese crumbles

1 teaspoon salt, divided

0.5 teaspoon ground pepper

8 ounces (half a box) of lasagna noodles cooked according to the directions

3 Tablespoons butter

3 Tablespoons flour

0.25 teaspoon dried thyme

0.25 teaspoon dried chili flakes

2 cups whole milk

5-6 ounces Gruyère cheese

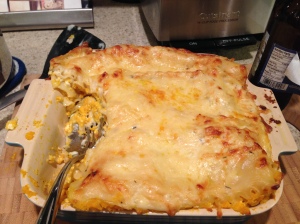
three-cheese pumpkin lasagna

three-cheese pumpkin lasagna

1. Preheat oven to 350 degrees.

2. Make your filling.  Mix the pumpkin puree, ricotta cheese, goat cheese, 0.5 teaspoon salt and 0.5 teaspoon of pepper into a bowl and mix thoroughly.  Give it a taste and add more salt and pepper if you think it’s too bland. Set aside.

3.  While your noodles are cooking, make the Béchamel sauce.

4. Melt butter in a small saucepan over medium heat.  When the butter has all melted, start stirring with a whisk and add the flour 1 tablespoon at a time.  After all the flour is incorporated, keep stirring for 1-2 minutes.  This is the roux.

5. Slowly add the milk into your roux.  At first, only pour in a couple of tablespoons and whisk it like mad to keep any clumps from forming.  Keep adding milk in larger and larger amounts until it is all added in and blended well.  If you dump all the milk in at once, you will have very clumpy and runny sauce on your hands.

6. Add the thyme, chili flakes and 0.5 teaspoon of salt to your sauce.  Bring it to a boil while stirring (still over medium heat), and let it boil softly for about a minute and then take it off the heat.  Add 0.5 cup of shredded Gruyère and continue to stir it for 30-60 seconds after coming off the heat until the cheese is fully mixed in.

7. In a 9″x9″ baking pan (I use a Le Creuset baking dish) start by spreading about a third of a cup of sauce in the dish.  Then layer on noodles, then half of your pumpkin-and-cheese filling.  Top the filling with two thirds of a cup of sauce, then top with noodles and the other half of the filling.  Sauce it again, put on noodles and pour the rest of the sauce on the top.  Add the left over Gruyère on the top.

8. Place your lasagna on a cookie sheet (in case it bubbles over) and cook for about 45 minutes until it’s golden and bubbly on top.  Let it rest for about 5 minutes before serving.

Eating his 4 cheese pumpkin lasagna while watching the State of the Union Address

Eating three-cheese pumpkin lasagna while watching the State of the Union Address

January Gardening: Rhubarb

So I finally managed to get a few hours of semi-warm daylight to get out in the yard and do some gardening. It’s starting to get embarrassing, the beautiful garden I had all summer looks like hell now. Thankfully the hubs went out a day or two before Christmas and took out all the dead sunflowers. I’m pretty sure I’ll be growing 8′ tall sunflowers in that bed for the next 5 years. So many seeds were scattered by the squirrels, it was unreal. Oh well, there are worse things to have in your garden than volunteer sunflowers.

January beds all cleaned up

January beds all cleaned up

My efforts were focused on weeding and getting the rhubarb into the front bed. I had 2 rhubarb plants in my herb bed that are semi-productive, but just need more space, so they moved. And we also moved a sad rhubarb that was hanging out in our backyard around to the front bed as well. I have no idea if the backyard one was a red or green or anything about it because it gets run over by the lawn mower on a regular basis. I did not split the ones from the herb bed, because I wasn’t sure I knew how to do it, and the hubs did split the one from the back, though it was more by accident and out of irritation than anything intentional.

So how are you supposed to grow rhubarb?

Rhubarb is about as hardy as they come, from the reading I’ve done. They are productive in the spring and summer and go dormant in the fall and winter. The dormant time is when it’s ideal to transplant and split the rhubarb crown. Most people wait until early spring when the rhubarb buds have broken through the ground to determine where to split the root. You should try to keep buds with each portion of root. The crown/root ball can get pretty large; I had one that was easily 2 feet in diameter, and most likely I could have just split it down the middle and then into quarters and it would produce well. Many references say that rhubarb should not be harvested the first year after splitting, and that only crowns at least 4 years old should be split.

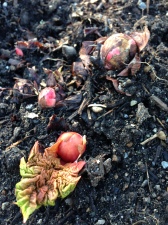
Rhubarb buds peeking up out of the ground

Rhubarb buds peeking up out of the ground

Maybe I’ll split them up next year, or maybe I won’t. A family can only eat so much rhubarb…

Rhubarb prefers well-drained soil.  Its arch nemesis is crown rot, which can occur if the soil doesn’t drain at all. During the summer you should water your rhubarb on a regular basis, but it’s not a guzzler like some plants are (tomatoes).   I’ve read in multiple places that rhubarb does fine in pots, but I have not found that to be true; mine was a sad, pathetic thing that never produced anything until it got some space.

Harvesting is probably the trickiest part of rhubarb growing, because there are RULES, yes, rules to harvesting.  So, don’t harvest too much the first few years, and never harvest all the stalks.  One reference said once the stalks start getting skinny the harvesting should stop as well.

The leaves of rhubarb are poisonous, only the stalk is edible.  And really, the stalk is only edible after it’s cooked. Also, you shouldn’t cut the stalks off the plant, they should always be pulled out.  Cutting the stalks can also lead to crown rot via decay of the remaining stalk attached to the crown.

Things to do with rhubarb

  • Rhubarb-and-strawberry crumble or pie. It’s an ideal pairing because both ripen late spring/early summer, around May to June in the Pacific Northwest. Rhubarb provides a nice tang that complements the sweeter strawberry nicely.
  • Rhubarb jam. This was a pleasant surprise in our household. I always assumed it needed to be combined with another fruit to tame it, but took a leap of faith and made some. It’s really good, sweet and tangy, great for toast and sandwiches.
  • Bluebarb (Blueberry-Rhubarb) jam. This was also a big hit at our house this year. I’m forever in debt to my friend from high school, who dug out her mom’s old recipe for it. It tastes amazing and is a great way to use your extra pounds of blueberries.
  • Rhubarb can be chopped and frozen to be used during the winter for desserts as well.
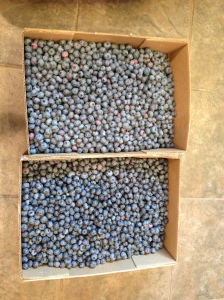
25 pounds of blueberries

25 pounds of blueberries

Bluebarb Jam (from the Pintler family)

I think this recipe may have come from a small batching cookbook, but I’m not sure which one.  This is a canning recipe and requires processing the jam in a hot water bath.  This recipe is not intended to teach anyone proper canning technique, please refer to the USDA’s website for Home Food Preservation to learn how to can properly and safely.

Ingredients:

3.5 cups chopped frozen rhubarb (I used some frozen and some fresh)

0.5 cup water

2.25 cups blueberries (fresh or frozen)

1 Tablespoon lemon juice

1 package dry pectin

5.5 cups white granulated sugar

1. When chopping the rhubarb, make sure to chop it up well. Large pieces will make your jam turn out stringy.

2. Mix rhubarb and water in a non-reactive pot and bring to a boil.

3. Cover, reduce heat to low or medium low, and simmer the rhubarb for 5 minutes.  Stir a couple times to prevent sticking and burning.

4. Add blueberries, lemon juice and pectin.  While continuously stirring, bring mixture to a boil.

5. Add sugar, and while still continuously stirring (the life of a jam maker), bring it back to a boil and boil hard for 1 minute.

6. Remove from heat and pour the jam into sterilized jars.  Process the jars in a hot water bath for 15 minutes, then let them sit for 5 minutes with the heat turned off in the water.

7. Check your seals, label the jars, and you’re good to go.  I recommend using this one as gifts for hostesses and as Christmas presents.

Starting to wish for summer

Starting to wish for summer

My 3rd Annual Freezer and Pantry Cleanout

Does this happen to anyone else?  You spend all summer and fall putting up food for winter like you’re some kind of squirrel, and then one day during the winter you come to the realization that your family could easily eat nothing but your hoard for a month or more?  Today I tried to find a bag of frozen pearl onions in my chest freezer and this is what is found…

The January Freezer

The January freezer

There is a ham, whole turkey, salmon, tilapia, peaches, strawberries, blueberries, chicken stock, tomato sauce and who knows what else in there.  My freezer barely has room for a bag of ice, which I need for my gin and tonics!  So clearly I need to stop going to the grocery store and start eating from the freezer.  I’ve noticed I’m hesitant to hit the freezer too hard until after Christmas, not sure why.  Also, during the holidays I tend to scour my local Whole Foods for turkeys, hams and roasts that go on sale once the big day is over.  Pile all that on top of the pounds of berries that I freeze and the containers of soups and sauces and I’m left with a freezer that the hubs refuses to open for fear of falling in and never being found again.

So, after I looked in my freezer I decided to check out my utility room pantry…

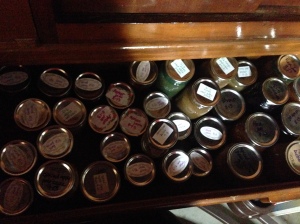
IMG_5126

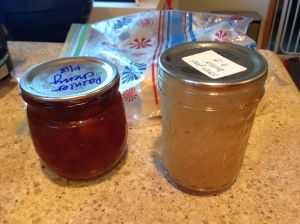
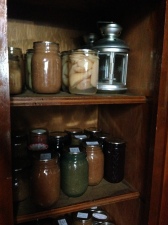
Pantry drawer full of jam and applesauce

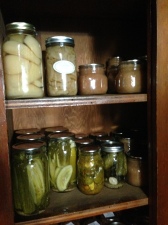
IMG_5127

pears, pickles and beets, oh my!

OMG, did I really make that much jam and applesauce?  I think at one point this fall I counted 147 full jars in the pantry.  That is ridiculous!  No wonder I felt like I spent my summer canning!

I do think there were some big canning successes this year and some meh products produced.  My cucumbers were prolific and I followed my grandpa’s rule and always had the cucumber in the jar within 2 hours of it being picked.  This meant a lot of only canning 3-4 jars at a time.  I have dill, butter, refrigerator and sweet pickles.  I easily have enough to last next year as well.  Which I actually think works out perfectly.  Making pickles can be a lot of work, so getting myself on a 2- to 3-year cycle means I can pickle beets and beans in the off summers.

I have jam to last me a lifetime… I think.  We eat A LOT of jam in this house.  My plum jam, made from plums at the Hood Canal cabin, was my surprise success.  It’s hot pink and has a great sweet-and-sour balance that works with everything from toast to yogurt to pork.  The spiced Rainier cherry jam and citrus pear butter also turned out amazing.  I never seem to make enough peach jam and peach  butter.  I wait until Peach-O-Rama at my local Metropolitan Market grocery store; the peaches are expensive but amazing.  Easily the best peaches I’ve ever eaten.

IMG_5131

My 2 best jams of the season!

Next year I will stay away from the mixed berry jams.  I think I prefer the jams and butters that only have 1 or 2 flavors, my raspberry-strawberry-blackberry-blueberry stuff just tastes like a mess.  On the other hand my blueberry-rhubarb [Editor’s note: aka blubarb] jam was divine!  Instead of the mixed berry jams, I’ll likely freeze more of my berries or make single-berry jam, either with pectin or as freezer jam.

This year, I made 2 batches of strawberry jam this year, one with pectin and one without.  The one with pectin didn’t have to be cooked as long, so it retained more of its fresh strawberry taste.  The one without pectin basically tastes like a strawberry fruit roll up.  And while we’re on the subject, I did have one epic fail this year.  I made the mistake of using a thermometer to guide when my blackberry jam was done.  By the time you have the right temp on the candy thermometer, it’s overdone!  My blackberry jam is so hard it can’t be spread with a knife!  I think I’m going to have to toss it all because I have no idea what I can do with it.

Here’s to the 2014 larder!

IMG_5128

Pears and applesauce

The New Year Brings Smoked Oysters and Clams

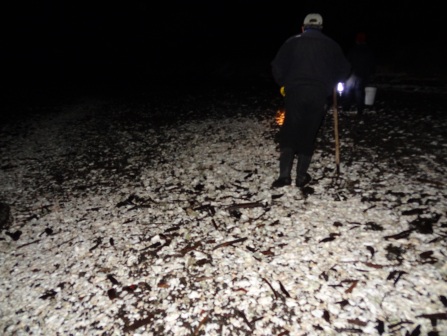
We decided to spend a few days around New Year’s out at my parents’ cabin on Hood Canal.  All of us had been craving oysters and clams, but the low tides were all after the sun went down.  So one night the hubs, my dad and I donned our headlights, grabbed our lantern and headed down to the beach around 7:00 p.m.  It was so dark, dark like in horror movies.  There was no moon, but also no wind and no rain which meant that going down in a fleece and tennis shoes was OK.

Dad walking through the oyster shels

Dad walking through the oyster shells

For those of you who have not done night oystering and clamming, it is fun!  It’s hard to see what you’re looking for, and it sometimes feels a little creepy that a creature could potentially attack you long before you saw it, but it was still fun.

We brought up 3 limits of oysters and 120 clams (minus a few that turned out to be rocks).   We decided to pull out the smoker the next day and smoke them up.  My dad and I both have a Little Chief Smoker and it comes with a recipe booklet by SmokeHouse Products that can be downloaded online.

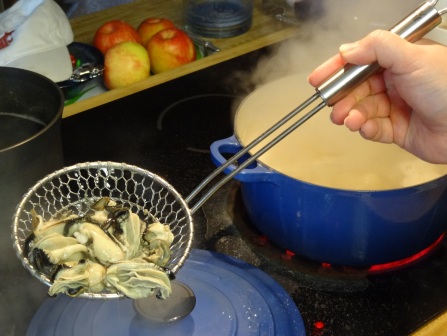
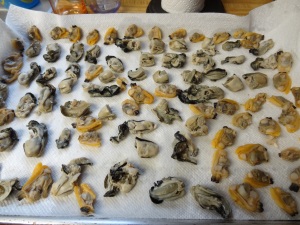
Blanching oysters

Blanching oysters

We used the Easy Cure brine, which is 1 quart of cold water with 0.5 cup non-iodized salt and 0.5 cup of white sugar (though I’m pretty sure you could also use brown sugar, which we intend to try next time).

How to smoke oysters

1. Put a large pot of water on to boil.  Fill it up only halfway with water (this stuff is GROSS if it boils over).

2. Shuck all the oysters and rinse them in cold water to remove any shell remnants.

3. Blanch the oysters a few at a time in the boiling water for 2 minutes.  You basically are starting to cook them and want the edges to be curling.  If you add too many to the pot at one time and the water cools down too much, leave them in for longer.  I think I usually blanch 6-7 at a time.   Put them into an ice-water bath when done to stop the cooking process.

4. Put the oysters into the brine and refrigerate for 40-50 minutes.  Use a glass or stainless steel bowl– do not use plastic.

5. After they have brined, rinse the oysters in slightly warm water and put them on a baking sheet covered with a layer or two of paper towels.  Make sure they aren’t touching.  Leave them out at room temperature for about 30-40 minutes (this is the “curing” stage).

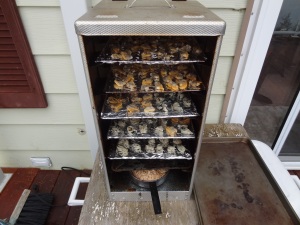
6.  Most smokers have racks that are too big to allow for oysters and clams to be smoked, so we covered our wire racks with foil and poked holes in the foil to allow the smoke to come through.

7. Smaller oysters are ideal for smoking; if you have really big ones, cut them into halves or even thirds.  Try to make your oysters relatively uniform in size.

Oysters and clams curing before going into the smoker

Oysters and clams curing before going into the smoker

8. Smoke for 3-4 hours using alder chips.  We used 3 pans of alder chips, changing out the pan every hour, but we could have done it with just 2.  I would avoid using heavier scents like hickory or mesquite, which will overpower your shellfish.

How to smoke clams

1. Fill a large pot with a few inches of water and bring to a boil.  Add the clams and cover.  Start checking for open shells after 3-4 minutes and pull them out as they open up.

2. Remove the clams from their shells and place them into the Easy Cure brine.

3. Follow steps 4-8 above.  I tend to put oysters on the lower racks and clams on the upper racks of the smoker.

The smoker all loaded up and ready to go

The smoker all loaded up and ready to go

So what do you do with smoked oysters and clams?  I have a few ideas…

Smoked Oysters

  • Chop up finely and add to soups or sauces that need an extra seafood umami flavor.  I have added a few to clam chowder, and yesterday we actually added a few to beef stew.  Basically any time you would consider adding anchovy paste, you could finely chop up some oysters and add them instead.
  • Serve them as appetizers or snacks with cheese and crackers. I store mine in a jam jar in my fridge covered in canola oil (canola has less flavor than other oils).  I keep 12-15 in the jar in my fridge and the rest in the freezer.  As I use up the ones in the jar I just toss in a few frozen ones into the oil and put them back into the fridge.
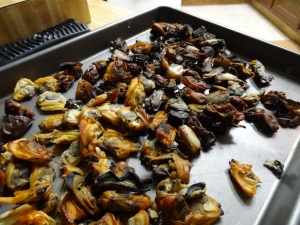
Smoked oysters and clams

Smoked oysters and clams

Smoked Clams

I haven’t used these as much, but I think they would also make great appetizers.  I haven’t tried storing them in oil, but cooked clams freeze well.  My mom loves to make clam linguine, so we made it with smoked clams instead.

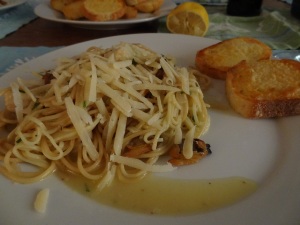
Mom’s Smoked Clams and Linguine

Ingredients

1 medium onion, finely diced (roughly 1.5 cups) – could also use leeks instead of onion

5 Tablespoons of unsalted butter, divided

2 Tablespoons olive oil

4 large cloves of garlic, crushed then finely chopped

0.5 cup dry white wine (my mom prefers Woodbridge Chardonnay)

2 bottles of clam juice (16 ounces), well shaken

0.25 teaspoon celery seed

40-60 smoked clams

2 Tablespoons chopped fresh parsley

10 ounces linguine pasta – cooked per directions

0.5 cup pasta water (save just in case you need it)

Salt and pepper

Grated Parmesan

clam sauce a cookin'

My mother’s rule: Only one drink until the meal is on the table

1.  Heat 2 tablespoons of butter and 2 tablespoons of olive oil over medium heat in a large skillet

2. Add chopped onion and cook until softened, 2-3 minutes, add 0.25 teaspoon pepper and a pinch of salt.

3. Add garlic and stir until nice and fragrant, but not browned, 1-2 minutes.

4. Add 0.5 cup wine, increase heat to medium-high and boil for 1 minutes.

5. Add clam juice, bring to a boil, then reduce heat to medium-low or low and simmer, uncovered, for 15-20 minutes.  Stir occasionally.  You don’t want the clam sauce to taste too watery, so reduce it by at least a cup.

6. Add celery seed, smoked clams and parsley to sauce and mix.

7. Add cooked pasta (remember to reserve a cup of pasta water!) to the sauce and cook over low heat for 2-3 minutes.  You want the pasta to soak up some of the sauce.  If the pasta soaks up too much and you don’t have enough sauce left add 0.25-0.5 cup of your pasta water to the sauce.

8. Add remaining 3 tablespoons of butter and allow to melt on top. Mix together and serve warm with grated Parmesan.

Linguine with smoked clams

Linguine with smoked clams

My new hobby: Mushrooms!

I had been meaning to join the Puget Sound Mycological Society (PSMS) for years, and last year I finally did.  Of course I waited another, like, 8 months or something before I went to a membership meeting and realized how freaking awesome these people are.  This past Sunday was spent in an all-day class that “introduced” me to the various aspects of being a mushroom lover.

Image

Ready for mushroom class to start

I’ve always had a fascination with mushrooms.  Having grown up camping in the Pacific Northwest I was constantly finding mushrooms, and I thought they were beautiful and mystical.  I can remember being about 12 years old, and we were camping in the Wenatchee National Forest (I think) and my mom found some beautiful spring morels.  We picked a bunch and she cooked them up on the camp stove and served them with dinner.  I’m pretty sure she waited until after we had finished to tell us they were poisonous if eaten raw. They tasted so good!

When I started working as a pharmacist, I got put off by the idea of finding my own mushrooms and eating them.  I had seen more than my fair share of patients who had eaten bad mushrooms and ended up in liver failure, or requiring a liver transplant (I work in critical care, so I only see the scary shit).  The words Amanita phalloides still roll off my tongue very naturally.  Amanita phalloides is the Death Cap; this innocent-looking mushroom can kill you by destroying your liver.  Needless to say I was hesitant to pick iup mushroom hunting as a hobby until I moved back Seattle and realized that our climate up here is perfect for mushrooms.  In fact, we’re one of the best places in the world to look for chanterelles.

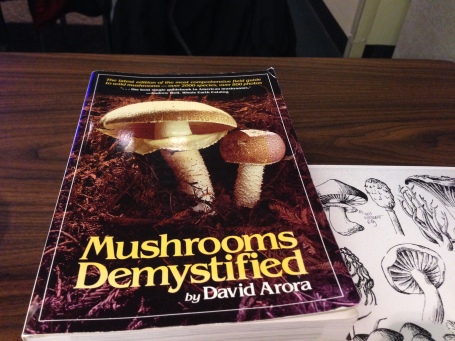
Image

The bible of mushroom identification

So I joined, and while I haven’t gone mushroom hunting yet, I have learned some very valuable and useful information:

  1. Don’t eat it unless you are absolutely certain what it is.  And even if you do know what it is and know it is edible, you still don’t have to eat it.  This may sound a little “no duh”, but I think it’s a very important point to make.  I believe the analogy used a few times was “You wouldn’t invite every person you know over to your house, so why would you eat every mushroom you find?” (Said by Danny Winkler) Sage advice.
  2. Learning how to identify a mushroom can be really hard work!  Especially if it is a gilled mushroom.  We tried to identify baby portabella and oyster mushrooms in class and I have to admit, my teammate and I struggled.   My plan is to take everything I find into the PSMS ID clinic and confirm my findings with someone who knows what the hell they’re doing.
  3. In addition to the logical things you should take on a mushroom hunt such as good boots, a raincoat and a basket, it is also recommended you take a compass.  I’m sure you’re thinking, “Oh yeah, that sounds pretty smart.”  But what’s even smarter is they reminded us that you should use your compass as you’re starting out so you know what direction will lead you back to your car (brilliant), they also recommended you learn how to use a compass properly before starting out (also brilliant advice.)
  4. The King Bolete is also known as the porcini mushroom!  Hello!  So not only can I find chanterelles and morels within an hour or two’s drive from my house, but I can find porcinis as well?!?!?  Sign me up!
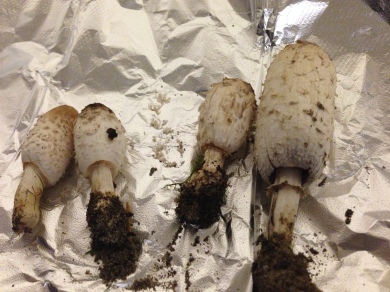
Image

Mushrooms that dissolve into black ink a couple of days after you pick them

I liked that there are some ethics and principles to follow when you’re looking for mushrooms:

  1. Unless you need to identify the mushroom, you should always cut it and not pull it out.
  2. Do not rake the ground (or in any other way heavily disturb it)
  3. Leave small mushrooms to grow
  4. Ask permission before trespassing on property
  5. Check the permit status (apparently there are a lot of rules around mushroom hunting)
  6. Don’t over-harvest
  7. Never, Ever, Ever, ask someone where their secret spot is
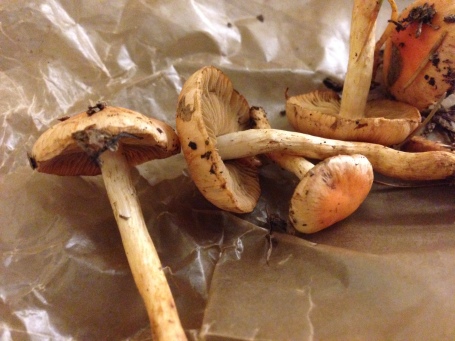
Image

No idea what they are, but thought they looked cool

The Economics of Gardening: Herbs

Growing my own herbs is one of my favorite aspects of gardening.  I love to cook and realized years ago that buying herbs can be one of the most expensive ingredients for a recipe.  I absolutely hate going out and spending $3 on a sad little packet of fresh herbs only to realize I only needed 1 teaspoon of it and then the rest of it ends up going bad in my fridge.  Does this sound like your life as well?  If it does you should consider growing your own.

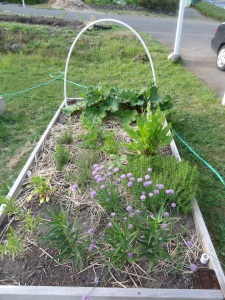
Herb bed in May 2013

Herb bed in May 2013

Growing most herbs is not challenging and many of them can be a year-round addition to your garden.  I have six 8’x4′ raised beds and the one closest to my house is dedicated to herbs.  It’s my only bed that does not rotate each year.  I have French sorrel, winter savory, 3 kinds of rosemary, English thyme, oregano, mojito mint and chives that live year round.  Each spring I plant basil (sooo much basil, and many kinds) and parsley.  Last year I also planted tarragon and a bay leaf but I have no idea if either one of them are going to survive the winter.  There’s always a chance that the rosemary won’t make it either, but I’m going to keep my fingers crossed.

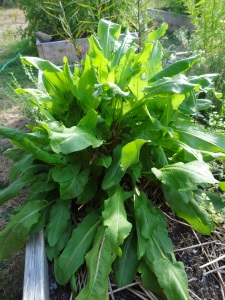
French Sorrel is has a light and citrusy flavor that is great on fish and in salads

French sorrel is has a light and citrusy flavor that is great on fish and in salads

In 2013 I harvested over $1,300 worth of produce from my garden and $253 of it was herbs!  The way I assigned value to everything was to compare what I would have paid for it at the grocery store.  Most fresh organic herbs are around $3.32 an ounce (did you know those small packets are usually only 0.75 of a ounce?) so I just multiplied that by how many ounces I brought in each day.  Some of my herbs such as the savory and sorrel I can’t buy at my local grocery stores so I gave them the same value.  All told I harvested almost 5 pounds of herbs… crazy!

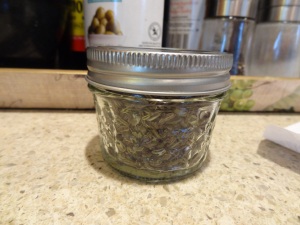
Dried fennel seed

Dried fennel seed

So what do you do with all these herbs?

  •  Use them fresh on salads.  I absolutely love spring salads when the greens are small and tender and putting fresh chopped herbs on top; my favorites are chives, sorrel and parsley.  When I make Caprese salad (tomato, fresh mozzarella and basil) I make sure there is a basil leaf on every tomato slice.  Heaven!
  • Put them on eggs.  The hubs makes scrambled eggs in the morning and if I have a container of chopped chives in the fridge he’ll add them at the end and they taste great.  I also add herbs to frittatas and omelettes.
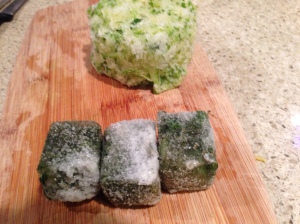
Frozen cubes of oregano, savory, rosemary and zuchinni destined for my marinara sauce.

Frozen cubes of oregano, savory, rosemary and zucchini destined for my marinara sauce.

  • Casseroles, gratins, lasagnas or any kind of baked dish.  Add them to your sauce towards the end of cooking, before the dish goes in the oven.
  • Soups and sauces
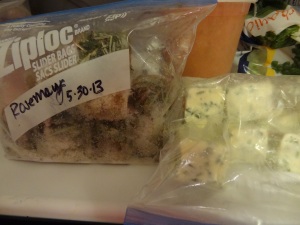
  • Make herb butter.  During the spring and early summer when my herbs are going nuts I make herb butter and then it goes into the freezer.  Mix roughly 1 tablespoon of room temperature butter with 2-3 teaspoons of finely chopped herbs, mix well and freeze in an ice cube tray.  Once frozen, pop them into a Ziploc and keep them in the freezer for the winter time.  At our house we use chive butter for toast , sorrel butter as a sauce for fish , and chive or rosemary butter to add some depth of flavor to sauces.
Chive butter and rosemary hanging out in my freezer

Chive butter and rosemary hanging out in my freezer

  • Have you ever noticed that the mint tends to be fresh and tasty before you get a mojito craving?  Well just chop up that fresh mint, cram it into an ice cube tray, add water, then freeze.  In the summer take out a few and add to your glass either as an ice cube, or let them melt to make your mojito.  I also make ice cubes of oregano, savory and rosemary which I add to soups in the winter.
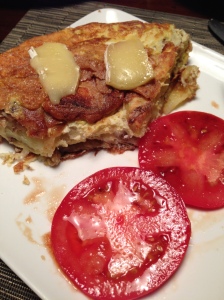
Herb and cheese fritatta with fresh tomatos

Herb, potato and cheese frittata with fresh tomatoes

  • Dry your own herbs.  This year I did a lot of drying in my oven.  I would take a baking sheet, cover it with parchment paper, space out the herbs in a single layer and bake at 170-200 degrees for 2 to 6 hours until everything was totally dry.  I dried basil, parsley, tarragon, savory and fennel seed this year.   Next year I’ll do more because I got a food dehydrator as an early Christmas present from my Fairy Godmother (yes, I really do have one).
  • Pesto!  Holy cow I almost forgot my favorite use of basil!  During the summer I make pesto by the pound!  I put fresh basil, olive oil, salt and pine nuts into the food processor and pulse until it’s a smooth consistency and then freeze in ice cube trays or mason jars.  When you want to use it as pesto you let it defrost and add parmesan and usually more salt until it tastes the way you want it to.

I’m looking forward to finding more herbs to experiment with in 2014. I think I want to experiment with more herb drying and non-basil pestos.

Happy Holidays from the Wannabe Griswolds

Happy Holidays from the wannabe Griswolds!

The Economics of Gardening: The Costs

I’ve always been told that gardening is not an economical hobby.  I just assumed this to be true; it always seemed like I poured tons of money into my garden every year only to have a meager harvest that could not possibly compare.  But now that I have a kid and a mortgage and all sorts of responsibilities, I thought I should make sure my “hobby” wasn’t a big money pit.

Starting in February I kept track of all of my gardening expenses, ultimately weighing every ounce of produce that has come out of my garden (minus what went straight into the mouths of my kid, friends and neighbors).   I think it was in October that I went into the black and it was a joyous day.

My costs for the year break down as follows:

1. Raised Beds: Total Cost $759.00

In the spring we added 3 new 8’x4’x1′ raised beds, spending $407 for the lumber and $352 for the soil.  We found the instructions for the raised beds in Sunset Magazine’s article, “The Perfect Raised Bed”. For lumber we used a combination of Western Juniper and Cedar.  Western Juniper is about a third the price of Cedar and lasts just as long, plus it’s a more sustainable resource than Cedar.  Our dirt came from Cedar Grove, the company that picks up our yard/food waste in King County.  They compost all our waste into dirt that has a lot of organic material.  The best part is you can order a large volume of it online and they will deliver it to your front door via dump truck (this is VERY VERY VERY exciting for the males in your household both young and old.)

Raised beds

All 6 raised beds in March 2013

2. Seeds: Total Cost $71.90

I have an addiction to seeds, seed catalogs and dreaming about gardening.  I tend to overpurchase in the seed department, but who cares.  This year I tried to make sure I only purchased seeds for stuff I would actually grow via seed.  I bought leek, spinach, kale, lettuce, mixed greens, beet, kohlrabi, carrot, sunflower and pea seeds.  Most of my seed purchases came from Baker Creek and Territorial Seeds.  Baker Creek is a family-run company that sells an extensive selection of heirloom varietals.  I literally look at their seed catalogs while I lie in bed and fantasize about what I want to plant.  Their family has traveled all over the world collecting heirloom produce and saving the seeds.  So if you want to grow tomatoes from Afghanistan or cucumbers from South Africa, this is the website for you.  Territorial was formed by Steve Solomon (the godfather of PNW gardening), and all their seeds are specifically designed to grow well in our climate.   I buy A LOT of seeds from Territorial, and the seeds from both companies can be found in many stores.

3.  Live Plants: Total Cost $293.00

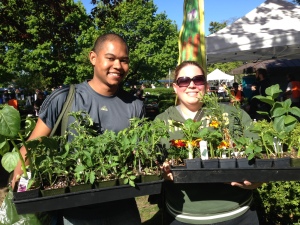
Many of my plants I buy as starts.  There are 2 main plant sales I attend: One is in March for the cool crops, and the other is in May when I get all my summer stuff. Both are hosted by Seattle Tilth.  This year, in addition to buying $45 worth of tomatoes, $18 of tomatillos and $42 of basil, I purchased a huckleberry bush and some yellow raspberry starts.  Did I mention I also tend to overbuy at plant sales?  I force myself to make a list of what I need and stick to it, but let’s get real, even that list is over the top… last year I brought my friend Eric just to help me carry all my plants!

IMG_3730

4. Supplies: Total Cost $122.48

This year I needed some new soaker hoses, tomato cages, fertilizer and other stuff (books, ladybugs, wooden stakes).  I also “won” a raffle from the Seattle Zoo that allowed me to purchase $30 worth of Zoo Doo!  Let me tell you nothing will blow your kid’s mind more than telling him there is hippopotamus poop in the garden.  I highly recommend getting compost from your local zoo if you can; it’s a great way for the zoo to take waste and convert it into something useful.  It’s also nice to know you are supporting your local zoo.

All told I spent $1,246.38 on gardening this year, which I think is pretty good considering half of that was for raised beds that I will be using for the next 5 years or more.  What I don’t factor into the cost is the time it takes me to garden. For me, gardening is my therapy time. It gets me outside and it makes me happy, so I figure I could garden or I could see a therapist.  I’ll take the garden.

Next Post: The Yields

Quack Quack

Quack Quack