Back in the Saddle Again

Well, it’s been almost 2 years since my last blog post. I’ve intermittently felt guilt for not keeping it up, wondered if maybe I should delete the whole thing because my life was NEVER going to be normal again. But, ultimately, what it comes down to is I can’t keep myself away from gardening and I love having the chance to talk about my gardening. It really does feed my soul. I haven’t gardened since the summer of 2014, and we sold our house with all the beds we built with our own hands. I’m now living in an enormous, ugly, featureless, brown house in the suburbs. Gone are my urban dreams and now suburban ones are starting to take root.

If you’re wondering about the hiatus, there’s a long version and a short version. Most of you who read this already know my story–you lived it with me and my family–but for those of you who don’t, here is the abbreviated version.

I realized I was pregnant on the 4th of July 2014. I woke up nauseous and miserable. In August I dropped a whole lot of f-bombs when I learned that not only was I pregnant, I was pregnant with triplets! Needless to say, our world changed dramatically. Not even high-risk OBs can tell you the incidence of spontaneous, identical, triplets.

So we sold the house, we sold the car, we leased a minivan (shudder), and bought an enormous house in the ‘burbs. Then disaster hit: we developed twin-to-twin transfusion syndrome, and one of our sweet babies passed away. The docs took us into surgery to fix the problem, told us they thought they saved one of our girls, but the other remaining baby might not make it. A month later my water broke, and 4 days after that I was in an OR giving birth to 2 adorable, teeny, tiny babies who were only 26 weeks and 3 days along.

Collectively we spent 199 days in the NICU, and roughly a year ago, we all managed to live under the same roof together. Life with preemie newborns and a 3-year -old is completely insane. I have vague memories of barf, diapers, breast pumps, nursing bras and sleep deprivation. Even a year out, the hubs and I are still wondering what it must feel like to be rested….

IMG_4259

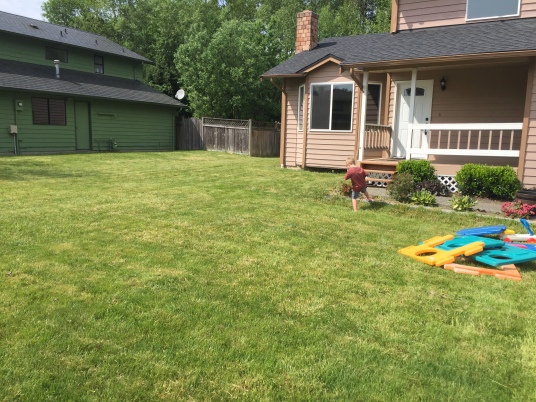
Our new house in the suburbs. Note the boring paint job and boring landscaping.

This year, the sun came out, and the grass is so green, and I needed to start gardening again. I needed to put my hands in dirt, watch things grow (plant things, not human things), and harvest my bounty. So, I put G in the minivan and drove off to Fred Meyer for some potting soil and plants. I let him pick out a lot of the plants. I honestly didn’t even care what they were as long as they weren’t flowers. We got some tomatoes, pumpkin, cucumber, basil, rosemary and lavender. A decent variety for a handful of pots and one sad, pitiful, little bed.

IMG_4277

My helper decided to beautify the sidewalk with a rainbow, which “is made when the rain mixes with the sunshine, and that’s me playing in the grass”

I’m OK with it because I know it’s temporary. The hubs and I have BIG BIG dreams of turning our entire front and side yards into raised garden beds:I want a large keyhole bed, with a patio for chairs and literally not one blade of grass.

I want to be able to hide between my beds, sitting in an Adirondack chair with a gin and tonic in my hand.

I want my kids to roam the garden eating cherry tomatoes, raspberries, blueberries, carrots, and snap peas.

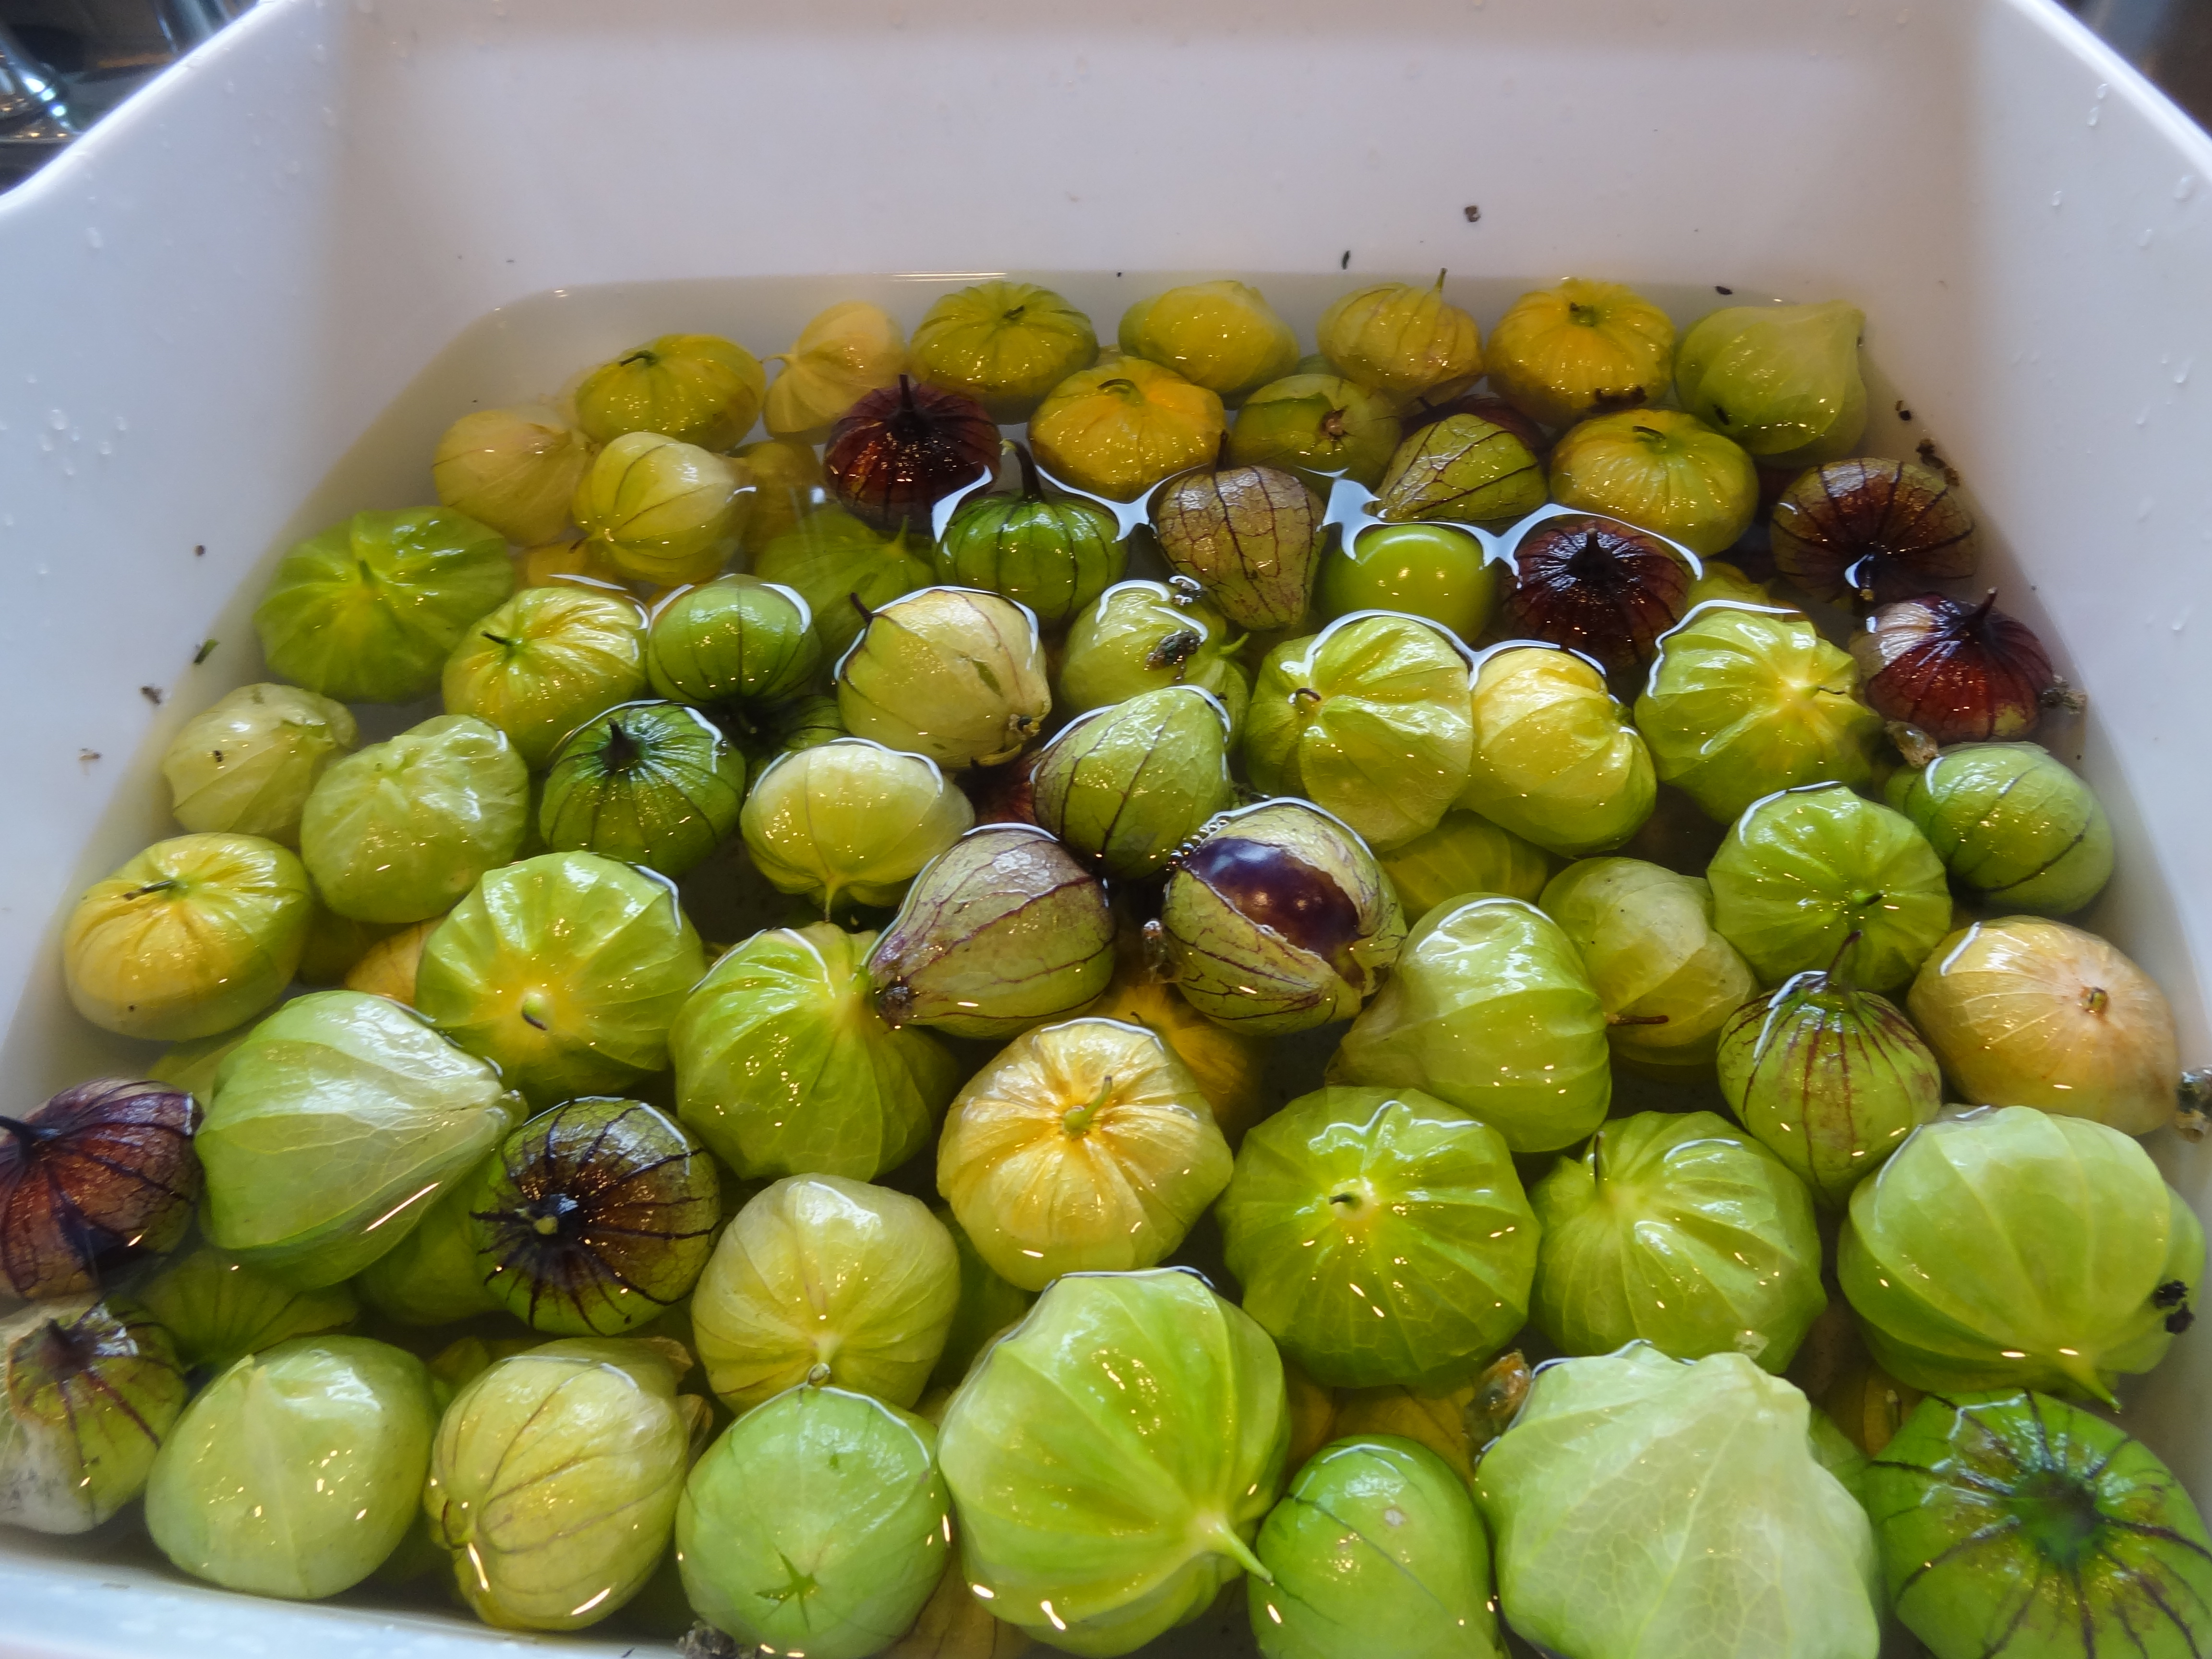
I miss eating produce that was just picked. I miss knowing exactly what I’m eating.

I miss feeling connected with Mother Earth.

IMG_4269

Hello old friends, I’ve missed you.

So I grabbed a few pots and started planting. What I didn’t expect was that 2 years of being pretty sedentary takes a long time to overcome. I struggled picking up the bags of soil. I got tired easily, but I didn’t care. It was a happy tired, and I think I learned how to take my time and enjoy the process. I mean really, what’s the rush? I’m sure I entertained the neighbors by puttering around my tiny garden like a senior citizen.

I’m learning how to enjoy the present, be thankful for what it is, and not rush myself into the next task. What I also didn’t anticipate what the hot mess my gardening tools were in.  I found myself standing in my garage repeatedly asking myself “now if I were my husband where would I put my gardening gloves/seed packets/fertilizer”. I eventually found everything, but not before ripping the garage apart. Oh well, I guess I get to start over with my organization too. There are worse things.

IMG_4271

Finally found a use for all those empty formula cans

My son will turn 5 this summer. We spent a LONG TIME talking about how to water plants. He insisted that directly onto the leaves was best. It took some convincing that watering the base is best for the plants. He made me explain how some plants (tomatoes) could get burned if you water the leaves, or how others (zucchini) could get moldy if you water everywhere. He’s a good helper and enjoys being in the dirt with me; I just have to give him tasks to do.  G enjoys anything related to digging or transporting water. He tried to dig out an ugly little bush thing but got distracted by a little snake who slithered by.  We don’t always get to spend enough time just the 2 of us, I’m happy that we have gardening together back in our lives.


Life is good. Sunshine is good. Rain is good. Gardening is great.

IMG_4274

My little slice of heaven…for now

10 Lessons I’ve Learned the Hard Way About Gardening

I have an independent streak.  Always have.  I often have to learn something for myself before I’m fully willing to believe it to be true.  I’m also incredibly stubborn.  This combination of traits has occasionally led me down some unfortunate paths in my garden.

For example, I’ll think “I need to plant this today, even if I only have one small pot full of old potting soil” when said plant really doesn’t do well in pots and needs a lot of compost for success.  So below are the top 10 lessons I’ve learned; maybe you’ll be smarter than me and not have to prove them all to yourself.

My potted pumpkins may rot in the container due to over-composting

My potted pumpkins may rot in the container due to over-composting

  1. Only plant food that you and  your family will actually eat.
    If your family hates radishes, you shouldn’t fill your garden with radishes. What on earth will you do with them?  You may think “oh, we’ll eat them anyway,” and “I’ll get my family to like them.”  You’re delusional. But if you insist, why not start with just one small row and see how it goes? Who knows, maybe you will be successful, but maybe you won’t.
  2. Grow quantities of food your family can actually eat.
    I have made this mistake MANY times with lettuce.  I over-planted and wound up pulling POUNDS of mixed greens, butter lettuce and romaine out of my garden.  I had to give so much of it away, I literally would show up to work with gallon-sized bags full of lettuce asking people to take them.  I also had to con the neighbors into eating it as well.In Seattle, the most common veggie to do this with is zucchini. Many an urban farmer has drowned in far too much zucchini. And I understand how it happens: you only want one plant, but the starts come in packs of 3 or 4.  You couldn’t possibly throw them away, could you?  Yes, you can.  Pick the best one and toss (or give away) the rest.
Over-planting... and poor seed distribution

Overplanting… and poor seed distribution

  1. Weeding is an everyday chore.
    Trust me on this one. Weeding will seem far less labor-intensive and anger-inducing if you just do a little bit every day. Also, don’t feel compelled to get every weed. Like the song says, let it go.
  2. Don’t overbuy at plant sales.
    This is a really tough one for every gardener I know, but if you do you will end up with a very, very crowded garden where none of your plants do all that well. It’s hard, I know; I walk by the tomato starts, pick my 16 that I knew I wanted but then feel compelled to try a persimmon tomato plant, or a green zebra. ACK! My trick is to plan my garden before the sales, show up with a list of what to buy and only bring cash. My other trick is I always allow myself a 1 or 2 impulse plant buys, and I build that into my budget and planning.
  3. Have a gardening buddy.
    It’s really fun to have friends that you can have great gardening discussions with, who live in your area and do similar gardening to you. My gardening buddy is a good friend who goes to the sales with me and occasionally shares starts. Everybody wins!
Tomatillos that I waited way too late to stake properly.

Tomatillos that I waited way too late to stake properly.

  1. Put the correct plant in the correct soil with the correct amount of watering.
    This year I had an epic fail with my potatoes and it’s because I didn’t follow this rule.  I planted them in burlap sacks using alternating layers of potting soil and compost (mostly potting soil) and then clearly didn’t water them enough, because I had it in my head that potatoes will rot if they get too wet. So I’m now harvesting them in June, instead of September, because they dried out. I also think I used too much compost in my containers and now I have containers that won’t dry out and the plants really are rotting. Grrrr……
  2. Learn how to thin your plants.
    I am terrible about thinning! I can’t bring myself to take perfectly good plants out of the ground just for the benefit of the others, it feels wrong. But what’s wrong is me, plants need space to grow and if you’re growing from seed you can’t count on every seed producing a great healthy plant, thus we have thinning. If you don’t think you will have a sub-par harvest and it will make you sad and angry and annoyed all at the same time. Please just learn how to thin your plants!
Summer 2013 was the Summer of Tomatillos, we had them coming out our ears! I have since learned that 6 plants is too many for us.

Last year was the Summer of Tomatillos: we had them coming out our ears! I have since learned that 6 plants is too many for us.

  1. Stake your plants early.
    Every single flippin’ year I tell myself I’m going to stake everything early when the plants are small… and I don’t, then I’m left with big, unwieldy plants that are falling over.  Trust me on this, your life will be so much easier if you just stake your tomatoes, tomatillos, pepper and eggplants when they’re little babies.
  2. Keep records of the plants you grow.
    I know that right after a plant sale I’m convinced I’ll remember all that I bought in a couple of days when I get around to writing it all down. I don’t. Every summer, as I’m harvesting tomatoes, I think “I love these, I should grow them again next year” or “These were a bit disappointing, better try something else next summer.” And you know what, if I don’t make a note of which ones I like or don’t like, I will buy the wrong ones the next season.  This is like the Murphy’s law of gardening.  Do yourself a favor, keep notes on it all.
  3. Use soaker hoses and water correctly.
    Many plants, such as squash and tomatoes, shouldn’t get wet to help prevent mildew; almost all plants need deep, infrequent waterings instead of shallow, frequent ones. Shallow watering leads to shallow roots, which leads to crappy plants. Soaker hoses are a great way to get water into the ground without wasting a bunch of it. I know this and still every bloomin’ year I’ll convince myself that one of the beds doesn’t need a soaker hose, and I’m ALWAYS wrong.  This year it was the broccoli.
Sidewalk chalk fun

Sidewalk chalk fun

Tonight’s Dinner: Penne Carbonara and Pavlova

‘Tis the season of fresh berries.  My family is eating a half-flat or more a week, so I’ve been trying to add them to as many meals as possible.  Tonight after work, I came home trying to decide what to make and the images I’d been seeing of pavlovas in my cooking magazines popped into my head.  As I was making the pavlova, I wondered what I should do with all of the egg yolks which led to a penne carbonara (though not as good as one that you’d have in a restaurant.)  This meal ended up bigger than I had expected, and with a side salad, it would have been perfect for 4 adults.

IMG_6251

Pavlova with whipped cream and fresh berries

Pavlova with fresh fruit and whipped cream

This recipe is adapted from the cookbook Urban Pantry by Amy Pennington.  I don’t have caster sugar at home, so I made my own.

Ingredients

6 egg whites (reserve yolks for different use)

0.75 cup superfine sugar (take regular sugar and put it in your food processor for a minute or two)

1 cup powdered sugar, sifted into a bowl

2 pints fresh berries (or more if you wish)

1.5 cups whipping cream

0.5 teaspoon vanilla

1 Tablespoon sugar

Berries and whipped cream ready to go

Directions

  1. Preheat oven to 300 degrees. Pull out a baking sheet and line it with parchment paper.
  2. Put egg whites into stand mixer and put on medium-high for 3-4 minutes until thick and foamy.  Increase the speed to high and add 0.25 cup superfine sugar at a time, allowing it to mix each time.  Continue mixing until stiff peaks form (I think you’re supposed to be able to turn the bowl upside down and have the egg whites stay, but I’m not that brave).  Make sure to scrape down the sides of the bowl once or twice while mixing.
  3. Once stiff peaks have formed, stop mixing and sprinkle the powdered sugar on top.  Gently fold it into your egg white batter being careful to not overmix.
  4. Put batter onto parchment paper in a circle.  Use a spatula or frosting spatula to spread it around.  You want it to be like a bird’s nest with a dip in the middle.
  5. Bake at 300 degrees for 30 minutes, then decrease heat to 250 degrees for 40-45 minutes.
  6. Mix whipping cream, vanilla and remaining sugar in stand mixer and beat on high for 2-3 minutes.  Keep in refrigerator if you’re not going to use it right away.
  7. Clean and cut up your fresh fruit while the pavlova is baking.
  8. When the pavlova is done, very carefully (trust me) move it to a serving plate and top with berries and cream.  I”m not sure if it’s supposed to be served warm or cooled off (probably both are fine), but I served mine warm and it was amazing.
  9. It won’t keep long, so share and leftovers with neighbors.
Pasta Carbonara

Penne Carbonara

Penne Carbonara

This recipe is a common one in Italy; every recipe I’ve seen for it involved pork product with egg yolk as the primary sauce.  This one turned out a little different, but it tasted really good.

Ingredients

5 slices of really good bacon, diced

0.5 cup of thinly sliced shallots (or onion/leek)

~17 ounces of penne pasta, cooked in salted water per directions on package

6 egg yolks

2 Tablespoons fresh parsley, chopped

salt and pepper

Parmesan or pecorino grated cheese

Carbonara ingredients

Carbonara ingredients

Directions

  1. Start boiling water for pasta.
  2. Cook bacon over medium heat for about 10 minutes until it’s pretty brown (but definitely not all the way cooked) and then add the shallots.  Continue to cook over medium heat for another 5 minutes until the shallots are caramelizing.
  3. Once the pasta is cooked, drain it and put it back into the warm pot.  Add the bacon and shallots and mix thoroughly.
  4. Add the 6 egg yolks and mix thoroughly into the pasta as well.  The heat of the warm pasta and warm pot will cook the egg yolks very quickly.  Generously salt and pepper the pasta, making sure to taste it.
  5. Sprinkle with parsley and grated cheese.
  6. Serve warm.

All told this meal was easy to make, but not necessarily quick.  The pavlova took almost 80 minutes from start to finish, but in that time I made the whipped cream, prepped the berries, and both made and ate dinner.  We’d been done eating for 2 minutes when the timer went off on the oven.  A fun and tasty summer meal that both the hubs and the toddler devoured.

IMG_6253


U-Pick Strawberries 101

I adore this time of year when the local strawberries are ripe. Pacific Northwest strawberries are amazing, delicate and fragile. The flavor can take your breath away, unlike those horrible, tasteless ones shipped up from California all year long. Strawberries, more than any other fruit or veggie, remind me of how wonderful food can be when you wait for it to be in season.

The strawberry season is short, June to July usually, and I spend that time cramming as many of them into my family as humanly possible. I also tend to stay up late at night processing them in various ways so we can enjoy them through the year.

13 pounds of strawberries riding home with me

13 pounds of strawberries riding home with me

So this year I did my research and discovered a few local, organic strawberry fields that allow U-Pick. (BTW you should ALWAYS purchase/eat organic strawberries. They are the #1 most pesticide- and chemical-ridden fruit in the US.  The guys who spray them literally wear hazmat suits.)

Why should you go pick your own?  Why not just buy them from Whole Foods or your local farmers market? Here are my top 5 reasons to pick your own strawberries:

  1. It’s fun for the whole family. Your kids will love wandering through the fields and popping berries straight into their mouths.
  2. They’re cheaper when you pick them yourself. Most places around Seattle charge $2.50 per pound.  I picked 13.5 pounds for $33. Compare that to the container you get at the grocery store for $4 to $5.
  3. They taste better! Berries that are allowed to ripen all the way in the field are sweeter than ones that were picked early to withstand shipping.  You literally can get them at their peak ripeness, and once you’ve eaten them that way you’ll have a hard time settling for an inferior strawberry.
  4. You get to reconnect with how food is produced. I love going out to people’s farms and getting to meet the farmers. Most are run by various family members and it makes you feel good to know exactly who your money is going to.
  5. Picking your own produce can be hard work. Strawberries in particular can be tough on the back. All I could think about today was how poorly most agricultural workers are paid for such brutal labor. I picked for about 45 minutes to get my berries, I can’t imagine how hard it would be to do for 8 hours. We really should be paying more for our food.
Cleaning my strawberries  in a tub

Cleaning my strawberries in a tub

Okay, so now I’ve convinced you to head out to a field and pick your own strawberries.  What do you need to know, and what should you know ahead of time?

  1. Research your options online to find where you’d like to go picking. In the Seattle area, I look at Puget Sound Fresh, a great website that allows searches by location, produce, harvest time, etc. Some farms will have websites, some will only have Facebook pages. It’s important to follow the farm’s news so that they are open and have product when you want to go.
  2. Wear comfy shoes and clothes that you don’t mind getting dirty. Sometimes fields are muddy, and you never know when a rogue berry will land on your shirt. Don’t forget the sunscreen either!
  3. Check beforehand to see what you need to bring. Most places have containers for you to use to pick and then take home your berries, but double-check to make sure that’s the case. And even though cards are accepted almost anywhere nowadays, some farms still accept only a check or cash.
  4. If you are planning to bring a big group, it’s always nice to give the farm a heads up.  The last thing you want to do is bring 15 people to a small farm you don’t know and find a limited supply of ripe stuff out in the field.
  5. Print out directions ahead of time. Some of these farms are out in the boonies and you may or may not have great cell reception.
Getting ready to make jam

Getting ready to make jam

Guidelines for picking strawberries in the field

  1. Start at the back of the field and work your way forward.  This serves two purposes. One, the back is usually less picked over than the front of the fields meaning you’ll be done earlier. And two, if you start at the front and work your way to the back you’ll be carrying all your berries back to the front when you finish, which can get heavy. Take my advice, start at the back.
  2. Check your berries to make sure they aren’t half eaten by bugs. Strawberries grow on the ground and are a popular food to many different creatures so check your berries before you put them in your tray.
  3. Handle your berries gently. Ripe berries are delicate and bruise easily, you don’t want to pile them more than 2-3 layers deep. Definitely no tossing them into your tray.
  4. If you’re going to make jam, pick some berries that are not fully ripe. Specifically, you want some that still have a blush of white on them.  As berries ripen, their pectin level drops dramatically, and a batch of jam made with 100% fully ripened berries will not gel well.
  5. Watch out for spiders.
DSC04248

Salad with chicken, strawberries, nectarines, bacon, pickled beets and balsamic vinegar

Once you have your strawberries home you need to process them fairly quickly. Fully ripened strawberries will only keep in the fridge for a few days before going bad, so you need to do a couple of things with them other than just eating them like crazy. What are the options?

  1. Rinse and refrigerate them. Berries that you are going to eat fresh should be rinsed gently and put in the refrigerator until they get eaten. Fresh berries are wonderful on cereal, in salads, as a side dish for lunch or dinner or just eaten as a snack. They won’t need any extra sugar or doctoring. My next batch will be used to make a pavlova for a dessert!
  2. Freeze them for later. Freezing berries is a great option if you love to make smoothies or want some to eat during the winter.  I leave the smaller strawberries whole and cut the larger ones in half.  After rinsing them, I place them in a single layer on a baking sheet and freeze them.  Once frozen, they can be vacuum-sealed or put into plastic freezer bags.  By freezing the strawberries on the baking sheet first, you avoid them freezing into one enormous clump.
  3. Jam, jam, jam.  Who doesn’t love strawberry jam?  Tonight I made strawberry-rhubarb jam, yum!
Freezing berries in a single layer on the baking sheet

Freezing berries in a single layer on the baking sheet

The Bounty and Economics of May

Did you know it’s June 1st today?  It totally sneaked up on me. I swear it was just 2-3 weeks ago that I wrote my last post and packed my bags for my Hawaii vacation.  Guess not.

The Pacific Northwest has been blessed with some amazing weather this year.  Normally in Seattle, summer doesn’t start until the 4th of July, but this year we hit 80 degrees in May!   I only had to cloche my tomatoes for a week (I cloche at night until the nighttime temps are safely above 50 degrees).  I’m blown away by how great my garden looks.

The homestead May 2014

The homestead, May 2014

This spring I have been keeping myself busy in the garden.  The hubs got inspired one Saturday and laid a whole bunch of landscaping fabric, took some leftover mulch from a neighbor and started mulching between our beds.  The interesting part is apparently there are places that will give out free bark mulch.   In Seattle there is a company who will deliver free bark mulch if they have to cut down trees for Seattle City Light in your neighborhood; there are also many arborists who will give out their bark mulch for free or at a small cost.  The mulch we got was pretty rough, but I’ll take free over pretty any day.

The burlap sacks in the photo are growing potatoes.  I can’t bear the thought of using an entire bed to grow potatoes so I’m trying my hand at the burlap sacks.  The hardest part is knowing how often to water them.  Potatoes are notorious for being sensitive to over-watering.

The front bed full of raspberries, rhubarb and volunteer sunflowers

The front bed full of raspberries, rhubarb and volunteer sunflowers

Every day I feel as though I’m drowning in weeds, raspberries and volunteer sunflowers.  Please trust me that if you grow enormous sunflowers and you choose not to take them down in a timely manner, the critters in your neighborhood will spread the seeds for you.  I have sunflower starts in EVERY SINGLE GARDEN BED.  I do love my sunflowers though, and this spring a handful of neighbors have stopped by to ask me if the sunflowers will be back this year.  Clearly, I can’t let them down.

Lots of raspberries

Lots of raspberries

The raspberries are also a new adventure.  Last year I bought yellow raspberry starts from Burnt Ridge Nursery, and clipped some red raspberry starts from my dad.  The starts from my dad have been in my family for generations. They come from Idaho, and the only other place I know where they grow is at the Monastery of St. Gertrude in Cottonwood, Idaho.   The Monastery has a raspberry festival every year to celebrate.  I keep meaning to go, but haven’t yet.

But I digress, I had no idea how much work it is to grow raspberries!  They send up hundreds of shoots that I’ve had to pull.  I do a walk through every 3-4 days and pull out the extras.   I need to talk to my dad more about his trick, I think he goes along the edge of his raspberries with a sharp spade to cut all the underground sprouts.

The volunteer sunflowers are already 2 feet tall

The volunteer sunflowers are already 2 feet tall

I have continued to weigh all of my harvests this year, but with some modifications from last year.  I’m not going to weigh any of the herbs.  I already know those are financially worth it to grow, plus it’s way too easy to pad my numbers by harvesting pounds of herbs that I’ll never be able to use.

I’m also trying to categorize everything by varietal.  For example, instead of just saying spinach, I specified if it was the Red Kitten or the Bloomsdale.  I’m hoping this will help me narrow in on what we like best and grows best in my garden.

This year in May I harvested $56.74 worth of produce.  It was mostly spinach, arugula (I ended up making a huge batch of arugula pesto when it all started bolting in the heat) and rhubarb.  In 2013 I harvested $94.10 worth of produce, but it was about 75% herbs so I think I’m actually ahead of last year.

I’m saving the best for last.  Today I harvested some of my Santé shallots!  They weren’t necessarily ready to be harvested yet, but I was in the mood to put one in my kale.  It tasted delicious.

My first iris

Our first iris

Inventing Dinner: Smoked Salmon Frittata

There are days when I get home late for a variety of reasons.  Sometimes the hospital is crazy, or my kid can’t possibly leave the playground early, or like today, I was forced to drive on the regular freeway (not the express lanes) in the pouring rain with morons.  People like to complain that Seattleites can’t drive in the rain, but I think we natives are great at it; it’s the transplants who suck.  But I digress.

I got home late at 5 PM, beating the hubs and our toddler by about 1o mins.  What to make for dinner? A search in the fridge revealed:

IMG_5605

Perfect ingredients for fritatta

A work friend had a freezer overflowing with salmon from several guided fishing trips she took with her hubby. Being the native that I am, I offered to host a dinner party where we cooked some and I smoked the rest. We shared the smoked stuff, so I had smoked steelhead and salmon (I’m lucky), as well as eggs, cheese and some veggies.  Ta Da! Dinner!

Smoked Salmon Frittata

Note: I think most of the components here could be swapped out easily for alternatives.  For example, leftover salmon or even trout would taste good, and instead of goat cheese, either cream cheese or Gruyère would be a nice choice.  Chives could also be a nice addition.

Ingredients:

1 cup roughly chopped onion

5 ounces sliced mushrooms

2 Tablespoons butter

1 Tablespoon olive oil

1.5-2 cups smoked salmon broken into small chunks (just small enough to know you have all the bones)

3 ounces goat cheese, crumbled

9-12 large eggs

1 teaspoon salt

Fritatta going into the oven

Frittata going into the oven

Directions:

1. Preheat oven to 350 degrees. Melt butter and olive oil over medium heat in a 10″ frying pan.  When butter has melted, add onion and sauté for 3-4 minutes.

2. Add mushrooms and continue to sauté for 10 minutes or so until the mushrooms and onions are turning brown (brown=flavor), then pull the pan off the heat.

3. In a bowl, mix the eggs and salt. Whisk well.

4. Add crumbled goat cheese and mix gently.

5. Making sure that the onions and mushrooms are laying out uniformly in the frying pan, place the smoked salmon in an even layer on top.

6. Pour egg mixture over top of the salmon and put  into the oven for 20 minutes.  It’s done when the center is firm.  A thicker frittata will take a few minutes longer.

Smoked salmon frittata with pasta salad on the side

Baked Oysters

I’m always on the look out for new oyster recipes.  We get to harvest them fresh off the beach throughout most of the year and only getting to eat your oysters raw, fried or smoked can get old.  I love oysters, I love harvesting them and I think our shellfish licenses are one of the most economical purchases the hubs and I make every year.  Hence, I’m always looking for new ways to use up my oysters.

DSC03742

My cookbook Northwest Essentials: Cooking with Ingredients that Define a Region’s Cuisine by Greg Atkinson is a great resource for oyster recipes and has some great ones that I used as inspiration.  My only issue with his recipes is that he must buy his oysters with the shell on (you’re not allowed to take the shells off of the state beaches in WA) and puts them straight onto a BBQ.  I’m not about the pull out the ol’ grill in the winter rain so I improvised.

IMG_5493

Baked Oysters with Greens, Cheese and Olive Oil

Note:  This is an extremely flexible recipe, you basically use what you have on hand and make it work.  Consequently, I didn’t include any measurements, I just use what looks good to me.  They always taste good.

Ingredients:

Greens – I’ve used chopped spinach, arugula, and chives.  I think you could use just about anything.  Rinse them well and give them a rough chop.

Cheese – You want a flavorful cheese that will melt nicely.  I’ve used grated parmesan and grated pecorino.  I think a sharp cheddar has potential as well as a dollop of goat cheese.

Olive Oil

Fresh Raw Oysters – I usually do at least a dozen at a time

1. Set oven to 450 degrees

2. On a baking sheet place either small ramekins, small gratin pans or oyster shells.

4. In each vessel put down a layer of greens, then put 1-4 oysters on top (in a single layer).  You can also put the greens on top of the oysters if you forget to put them underneath like I did.

5. Sprinkle with cheese

6. Put 1-2 teaspoons of olive oil on top of the cheese

7. Feel free to add some salt and pepper

8. Bake for 10-15 minutes until just barely done.  I like mine just barely cooked all the way through.

9. Serve hot.  Works well as an appetizer or a side dish.

I apologize for not having pictures of them after they come out of the oven.  The get eaten up so quickly I never seem to have time to take photos.

Right before going in the oven


Trying to raise an open-minded eater

I have a great kid.  He’s 2 years, 8 months and a wild bundle of energy and joy that continually amazes me.  He’s definitely in his “terrible twos” phase of life and we have a lot of challenges, but one challenge we don’t have is his eating.  We never have.  A  lot of people think we got lucky, but I don’t think that’s the case.  The hubs and I made some very deliberate choices both when I was pregnant and throughout his young life that would encourage him to be an open-minded and adventurous eater.  Here’s some of  what we did.

1. We (mostly I, but WE) read A LOT about what we could do to raise an open-minded eater while I was pregnant.  Some books that I specifically enjoyed and recommend are Hungry Monkey: A Food-Loving Father’s Quest to Raise an Adventurous Eater, My Two-Year Old Eats Octopus: Raising Children Who Love to Eat Everything, and Feeding Baby Green: The Early Friendly Program for Healthy, Safe Nutrition During Pregnancy, Childhood and Beyond.  I didn’t think it was possible to read too much while I was pregnant so I read everything.   Much of what we learned and did was inspired by these books.   The best lesson I learned from these books is to NEVER order off the kids menu at a restaurant.

Eating Yakisoba

Eating Yakisoba

2.  We ate healthy while I was pregnant and made a point of eating specific foods that I wanted my child to love.  Now, I have no idea if it has been scientifically proven that your kid will eat what you ate during pregnancy but it usually works out that way.  For me I ate fruit, especially citrus, pineapple and blueberry, potatoes and pho.  Those were the things that I craved most, but I also consciously wanted to pick foods that were healthy.  I ate a lot of fish, I tried not to ingest a ton of junk food or pop.  I now have a child who will choose fruit over just about everything in the universe.  He would easily choose a strawberry or kiwi over chocolate any day.

3. Food and mealtimes are fights we choose not to have with our child.  What I mean is, we don’t force him to eat anything he doesn’t want to (though we always encourage him to take at least one bite of everything), and we never force him to keep eating when he says he’s done.  The best part? I NEVER, EVER stress over whether he’s had enough to eat.  There are days he takes a few bites and he’s done and other days the kid eats as much as a linebacker.  We don’t judge, we don’t praise when he eats everything, we let him decide what is right for him.  This instills good eating habits and teaches him to eat when he’s hungry and stop when he’s full.  We do have some light snacking at our house, but not much and we try to not have any snacks for at least 2 hours prior to mealtime to make sure we’re all hungry when we sit down.

Eating pho

Eating pho

4. Our family eats together at the table for almost every meal.  I have to be at work at 7 AM, but we still sit around the breakfast table at 6 AM and eat our cheerios with blueberries or refrigerator oatmeal.  Dinner is the same, as well as lunch on the weekends.  He has been allowed to eat in front of the TV exactly twice: once for the State of the Union Address and once to watch a movie as a special Mama-Son Date Night.  We make a point of asking about each other’s days and have a nice conversation.  If the kid is done first, that’s OK; he washes his hands and is allowed to go play while we finish.

5. I am not a short order cook!  We all eat the same meal.  I cannot stress this enough, I literally think the most important thing we do is we don’t classify food as kid food vs. adult food.  It’s all the same, and he eats what we eat.  I know there are things he doesn’t like (carrots), but that doesn’t mean I don’t serve them.  I still cook them when I want and in different ways and sometimes he’ll like them, sometimes he won’t notice them (shredded in sauce or soup) and most of the time he’ll eat around them.  That’s ok.  We don’t make food specially to suit his taste.  I barely can handle making one dinner, much less two.  The thing that has been great about this is he’s been exposed to a lot of different foods and has come to love them.

6. We always introduce his food to him.  This may sound weird, but at each meal we set it in front of him and tell him what it is and point to each item.  Everything is always stated positively.  “Tonight we’re going to eat eggplant, it’s really yummy.”  We always phrase things as though he’s going to love them: “oh man, those carrots look so good.”  The goal is to never set him up to dislike something before he’s even tried it.

I’m super proud of the adventurous eater we’re raising, he’s constantly surprising me by trying new things and giving them a chance.  Now if I could just get him to use the potty….

Ready for spring...

Ready for spring…

Is it springtime yet??

Last Saturday was one of my personal holidays.  The Seattle Tilth Early Plant Sale was held down in Sodo.  For weeks I’ve been working on my spreadsheets, trying to determine exactly how many plants I can cram into my beds and containers.  I’ve been up late reading over the lists of plants that were going to be there and re-writing my list over and over again.  I think it’s my coping mechanism for getting through the late Seattle winter glum.  Going to the tanning bed is now frowned upon, and I don’t have a trip to Hawaii till April so I’m left with fantasizing about my summer garden to get me through.

Blooming shrub in my yard...not sure what it is

Blooming shrub in my yard…not sure what it is

This year I’m doing a modified square-foot gardening method.  I have a tendency to put my plants too close together and I think I’ll have better results if I space them out more appropriately.  The whole square foot gardening thing seemed a little too kitschy and “hey you need to buy all this stuff to make it work” which I’m not down with.  I refuse to buy special soil and replace it every couple years.  So, I modified the idea to fit my style.  The hubs built me a wooden one square foot frame with wood screws at 1 inch intervals around the sides.  I used the frame to mark out square foot intervals in my garden.  Long rubber bands were put on the screws so that I could adjust the internal squares to be 2″x2″ or 3″x3″ or 4″x4″.   It worked like a charm.

On Saturday I purchased my spring crops.  I’m trying broccoli again this year, specifically Umpqua and Early Dividend varieties.  In 18 square feet I put in 10 plants.  My previous attempts at broccoli have been mediocre I think because I had no idea I wasn’t going to be harvesting until June or July, and I crowded them.  This year I’m giving them room (and time) and then will use the bed for winter crops that will be planted in late summer (shallots and garlic).

Beautiful shallots!

Beautiful shallots!

The biggest purchase of the day was leeks.  2 containers of Bleu de Solaize, 3 of King Richard and 1 Carentan.  I know I should be planting my leeks from seed, but I’m feeling lazy this spring so I bought starts.  The square gardening peeps say  there should be 9 leeks per foot which I think is ridiculous, so I planted them 16 per foot, which still seems a little far apart but we’ll see.  Leeks keep well in the garden, the last of my leeks planted in March 2013 were picked in January and made a fabulous leek risotto.

Broccoli, arugula and spinach

Broccoli, arugula, leeks and spinach

My favorite purchase of the day came from Burnt Ridge Nursery.  An Olympian fig, Bay Laurel (large one) and Native Star Huckleberry have joined my small but growing collection of trees and shrubs.  I’m always thinking about things I can grow that are native to the Pacific Northwest and are not readily available for purchase.  The Olympian fig is an heirloom that was found in growing in Olympia, Washington.  It’s great for the Pacific Northwest and I’ve been told and read that it’s one of the tastiest and sweetest figs you can find.  I’m so excited!

My new Native Star Huckleberry

My new Native Star Huckleberry

What to do with that turkey in the freezer

After Thanksgiving I trolled my local Whole Foods looking for deals.  I ended up buying an 8-10 pound, organic, free-range, happy-life-living turkey for something like $30.  I brought it home and promptly tossed it in my chest freezer.

The January Freezer

The January Freezer

Last week I had dreams of roasting my turkey, Thanksgiving-style, but then reality sank in.  For me to work all day and then come home and roast a turkey would mean eating dinner a lot later than we usually do.  Probably after I normally go to bed.  So after I had let it defrost in my fridge for 4 days I had a dilemma…what to do with this bird.

I ended up cramming it into my very large slow cooker with a tablespoon of salt and a quart of chicken stock.  I left it on low for something like 6-8 hours and the thing was cooked almost perfectly.  I think if I had started checking the temperature earlier it really would have been perfect (165 degrees for birds).  After it was cooked I took all the meat off the bone and put it in the fridge.

What to do with tons of left over turkey?  I’m not a sandwich person…. so I tried 2 different things.  I made turkey noodle soup and turkey enchiladas.  Both were delicious.

Turkey enchiladas

Turkey enchiladas

Turkey Enchiladas

Note: I used homemade verde sauce made from tomatillos and jalapenos that I made during the summer and then froze.  But I think it would taste just as good with canned verde sauce.  The recipe I used is by Rick Bayless.

Ingredients:

4 cups shredded or diced cooked turkey meat, both white and dark meat

1 cup chopped onion

2 cups chopped greens (I used salad greens that were starting to get wilty, but I think spinach would also be tasty)

4.5 cups verde (green) enchilada sauce, divided

8  tortillas, 10″ diameter

2 cups grated sharp cheddar cheese (you could probably do regular cheddar or monterey jack)

Filling the enchilada

Filling the enchilada

Directions:

  1. Preheat oven to 350 degrees
  2. Mix turkey, onion, greens and 1.5 cups sauce in a large bowl and mix until everything is coated
  3. Place a heaping 0.5 cup of enchilada filling into the center of each tortilla
  4. Roll tortillas and put into a large, un-greased baking pan
  5. Pour remaining 3 cups of sauce on top of enchiladas, then top with the 2 cups of grated cheese
  6. Bake for about 45 minutes, until the cheese is browning and the sauce is bubbling
  7. Serve with sour cream and beans or rice on the side
Homemade enchilada dinner

Homemade enchilada dinner